
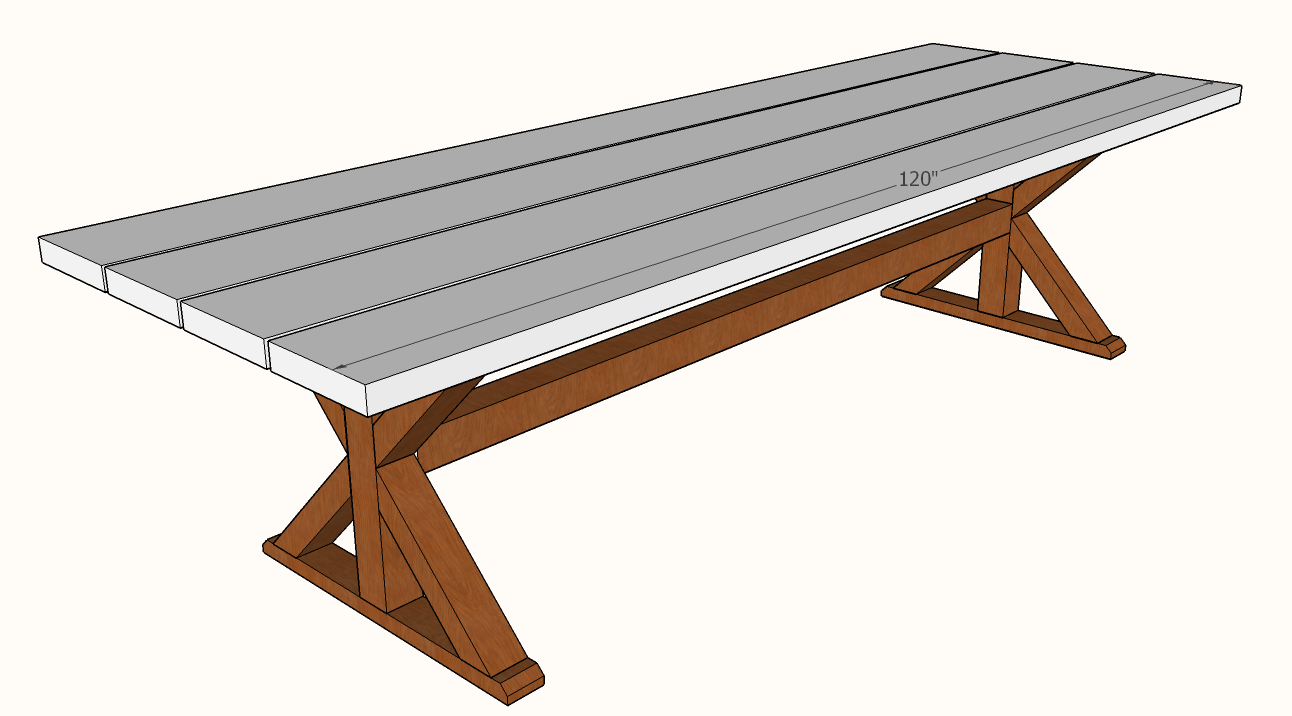
Here are free DIY chunky X base table plans, inspired by the ones you see in a Restoration Hardware or Pottery Barn catalog.
Note: These instructions are based on using dimensional lumber from a big box store for the “X” base structure, but account for having actual 2″ x 10″ material for the table top. If you plan to dimensional lumber for the top as well, you will want to add “feet” under the bottom supports of each leg structure of at least 1/2″ in thickness to bring the total height of the piece up to standard table height of 30″.
Required Lumber
- 3 – 4″ × 4″ x 8’
- 2 – 2″ × 4″ x 8′
- 4 – 2″ × 10″ x 10’
- ALTERNATE TOP: 5 – 2″ x 8″ x 10′
Tools
- Tape Measure
- Saw – Circular,or Miter Saw (preferred)
- Drill
- Countersink Drill Bit
- Square
- Sand paper or sander
- Wood glue
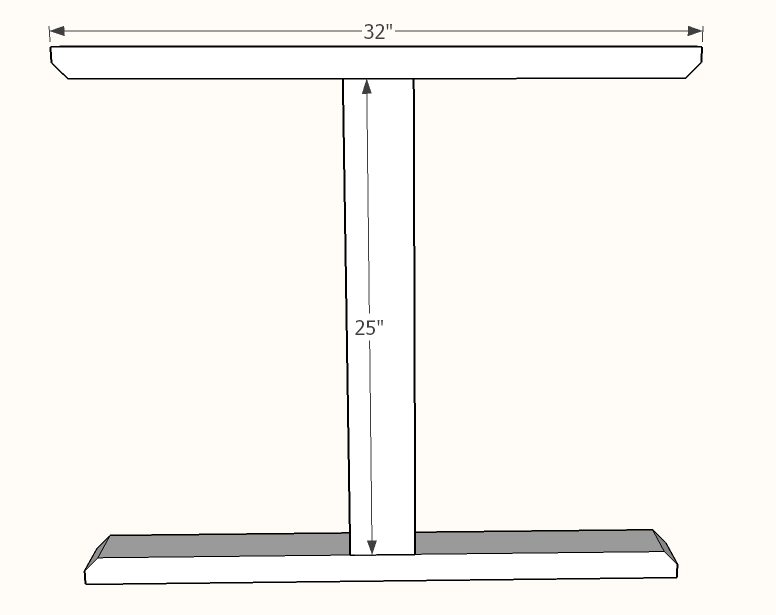
Step 1: Build the base of leg structures
The two leg structures are built exactly the same, so you’ll be cutting all of the pieces together at to save time and to help ensure consistency in the cuts.
First, cut four 2x4s to 32″ in length. These form the tops and bottoms of the leg structures. For a decorative touch, cut a 45° miter onto each end of the 2x4s 3/4″ in from each end.
Next, cut two 4×4 post pieces to 25″ in length. Then attach the top and bottom supports using four 3″ lag screws per end, ensuring they are counter-sunk so as to not interfere with the table top or make the base un-level.
Step 2: Cut the “X” supports
These supports are cut with 45° angles on both end, with a 12 47/64″ short end, and a 17 43/64″ long end. You will need to cut a total of eight of these X support pieces (four per leg structure). Use four 3″ lag screws per X support to attach to the top and bottom supports. To attach to the middle post, you can either use two 4″ lag screws per support, or use loose tenon joinery so you do not have the visible screws (I prefer the loose tenon joinery).
Step 3: Install the cross beam
Now that you have your two leg structures complete, the next step is cutting and installing the cross beam for support. In my example, based on a 10′ table design, I show cutting this cross beam to 87.5″ and attaching to the vertical middle of each leg structure. Of course, if your table is going to be shorter, you would reduce the length of this beam accordingly. Additionally, if you do not like the look of the beam so high, you could install it lower (as low as 2″ off the floor) on the middle support. To attach the cross beam, use three 5″ lag screws per end in a triangular pattern. Or, use mortise and tenon joinery to avoid having the visible screws.

Step 4: Install the top
The last construction step is to attach the four 2″ x 10″ x 10′ boards to the leg structures. Since we are using an even number of boards, and allowing for a 1/2″ gap between the boards for drainage, you are going to want to offset the inside edge of your first board on each side by 1/4″ from the center mark of the top support. Use four 2.5″ exterior grade wood screws per board (two per end), screwing up from the bottom, to attach each board to the leg structures.
These free DIY chunky X base table plans illustrate building a top for outdoor usage, but you could easily adapt the design of the top to not have the 1/2″ gaps between the top boards so it would be more appropriate for a finished dining room table.
Step 5: Sand and Finish
If using outdoors, I prefer to finish my cedar tables with Teak oil. If made from standard material from a big box store I would recommend a stain and sealant combo, but definitely don’t use a polyurethane.
I hope you found these free DIY chunky X base table plans useful. Please leave me a comment below and send me a picture of your work! And don’t forget to check out all of our other free DIY furniture plans.

* This post may have affiliate links, which means I may receive commissions if you choose to purchase through links I provide (at no extra cost to you). As an Amazon Associate I earn from qualifying purchases. Thank you for supporting the work I put into this site.
Discover more from Famous Artisan
Subscribe to get the latest posts sent to your email.